Showing posts with label eyeshadow tutorial. Show all posts

Tuesday, October 2, 2012

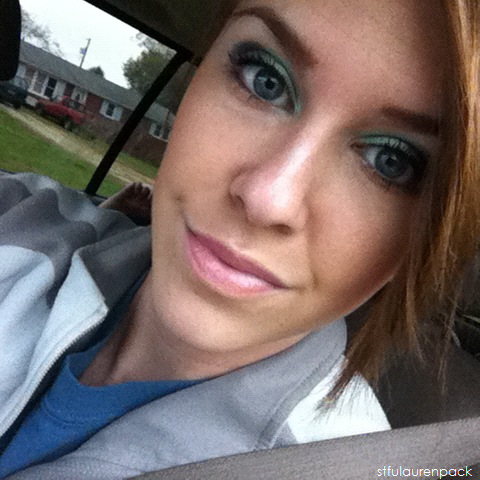
FOTD w/ Thirtyonewest Pigments & Pink Hair

This is kinda old - but I really like the way it came out so I'll share my 2-3 week old FOTD anyway ;)

I wanted to do my face just using my Thirtyonewest pigments so I can show customers how you can use them & what not.


The colors I used on my eyes:
Wedding Lace, Naked Study, Odd Liquorice, & Octopus Ink.


 I used Wedding Lace as the inner corner & brow bone highlight. Naked Study on the eyelid. Odd Liquorice on the outer corner & in the crease. Octopus Ink in the outer corner to darken the Odd Liquorice.

Colors on my face:
Antoinette - Blush & Lips!
(mixed Antoinette with a clear lipgloss for the lips)
Wedding Lace - Highlight.

 & Of course I felt prettier with my pink wig on ;)  I need to invest in some new colors of wigs. I like the pink but it's getting a little old :P 

I hope you guys enjoyed this FOTD look - be sure to check out our shop:
to get your pigments for only $6.00!
And let me know if you have any other requests of me using Thirtyonewest pigments!

Saturday, April 21, 2012

Prom Makeup 2012!

I did my co-worker's daughters makeup today for prom! I'm not going to post a tutorial on this entry just because I don't really feel like going through it when I'm not sure if people are even interested - so if you are interested in a tutorial - comment & I'll make one :)

I did a little shopping for my kit before I did her makeup - & I picked up a Mac foundation (I think it's called select something?) in NW25 & Urban Decay 24/7 Eyeliner in Zero as well as the new Naked 2 palette!

Here's all the products I used:
Just a cluster of things :)

And here's a random picture I took of myself while waiting on them to get to my house:
 I had a little photoshoot while I was waiting. :P Oh yeah! By the way, I dyed my hair back dark brown & got emo bangs :D Once my hair color fades a bit i'm going to get blonde highlights put in it.

 Before & After

& the finished look.

You like?
I wanted to use a pretty soft peachy coral or baby pink lipstick - but she did not want any lipstick at all - just lipgloss. All the eyeshadows I used were from my new Naked 2 palette :) & I also used the little lipgloss that comes with the palette for her lips.

That's all! Short, I know. But I have to go to work soon! Hope you enjoyed - don't forget to follow! :D

Wednesday, March 14, 2012

FOTD! & Somewhat of An Eyeshadow Tutorial? :)


Well, really - EOTD (eyes of the day)! This Elf Brightening Quad is one that I got from my recent Elf order and it's called Nymph Dreams. These quads are from their $1 Essential Line -- and they're quite pigmented for only $1. I personally love these palettes. If you're looking for cheap eyeshadows to start out doing makeup or just want to play around with colors to see what colors looks good on you - these are the palettes to get.


I have the colors numbered on the right side to show you how I wore this palette in the picture above :D

1. I used on my eyelid & brow bone
3. I put in the corner of my inner eye & blended outward.
4. I put in my crease & just a little above the crease as well.
2. I put over the #4 color and blended with it.

In the picture of myself with my eye closed -- it looks like the #3 isn't blended in well -- but it is? Haha, I'm not sure why it looks like that in the picture - but oh well! :)
 
 I also used some of my new Elf  lip products in the picture! I used one of my new Matte Lip Colors in the color Natural & one of my Glossy Glosses in the color Sweet Salmon.

Here's a little cluster of some of the other products I used for my face but I'm not going into detail on those. Just mainly wanted to focus on my eyes & lips in this post :)

That's all! Hope you all have a lovely day :D

Thursday, January 19, 2012

Cat Eye Tutorial


I'm lounging around today on my day off and decided to get pretty, so I figured I would share this look with everyone else ;)

 1.) Take NYX Jumbo Eye Pencil in Milk and apply it to your brow bone. Blend it in with your fingertips well.

 2.) Next, go over the blended in white with a shimmery creamy white. I used a color out of my 88 warm palette.

 3.) Take a crease brush and use a brown color to go into the crease of your eye. I used Ben Nye's eyeshadow in Mink Stole.

 4.) After you do the crease, you're going to draw an edge connecting it to your lash line with the same brown color.
Then, go back in with the creamy white color and put it on your lid inside the brown eyeshadow.

5.) Use a cosmetic tip Q-Tip and with a black eyeshadow, draw a wing. I used Mac's Carbon.
Don't mind my mole ;)

 6.) With the Q-Tip, go into your crease with the black eyeshadow. Blend it out well with a blending brush.

 7.) Go in with the Q-Tip and draw the black eyeshadow on like an eyeliner on your lash line. Afterwards (optional), if you'd like a more dramatic look, go over the wing & lash line with a black liquid line. It will look darker and give it more of a smokey look.

 8.) Next, go under your water line with the brown eyeshadow used before and add a little eyeshadow. Lastly, go over your lashes with some mascara. I use Tarina Tarantino's mascara. I loooove it! Make sure when you apply the mascara to go in an outward motion away from your nose. It gives round eyes more of a cat-like shape.

Finished! :D

Friday, October 28, 2011

New Thirtyonewest Eyeshadows - EOTD?

I've made 5 new eyeshadows to my Thirtyonewest collection! Wooo! I have added, Antoinette (very very hot pink), People Eater (Purple - duh! It's a smokey purple), Pudding Cup (dark glittery brown), I'm Your Present (a true mint green), and Odd Liquorice (dark greyish black).

Before work, I figured I'd try out a look using a couple of my new eyeshadows.
I used ' I'm Your Present ' & ' Odd Liquorice '.


I really like these two colors mixed together. Before applying these - I used my Urban Decay Primer Potion in Eden - and it's currently 11:00 at night (I put this on at 4:00) - & it looks like I just applied it!
I just labeled this EOTD (eyes of the day) becauseeee quite frankly I do not feel like going into details on what I did for the rest of my face, because I don't really remember lol. I use different products on my face each day.

I have the I'm Your Present eyeshadow currently listed on my Etsy site - but all the others are currently not. I'm suppose to have my Big Cartel site up sometime this weekend - so I'll just be listing all my cosmetic products on there!

Do you think this is a nice look? I kinda wanted to mix these together this weekend too because it's Halloweeny - sort of :P 

By the way, if you want to purchase any of the eyeshadows I mentioned in this entry & they still aren't listed yet -- just comment below & I can list some for you :)

Monday, October 17, 2011

Zelda: Twilight Princess - Midna Inspired Eyeshadow Tutorial

On a roll again with this 2 blogs in 1 day! Woohoo! Anyway, I'm off work today & got bored and decided to do a Halloween makeup look. I want to paint my face or do some kind of crazy makeup for Halloween & go out - so I was just testing a few that I'd like to do! If you've read my other blog posts, you know that I loooove Zelda! So I googled a bunch of the Zelda characters & tried to find one that had makeup on that I could try to mock. I came across Midna from Twilight Princess & decided on her!
.
^ Midna, of course.

Here's the products you'll need:
Elf Cream Eyeliner in Black ($3)
Beauty Rush Wet/Dry Eyeshadow in Plum Crazy ($7)
Maybelline Line Stiletto in Black ($6-7)
Neutrogena Makeup Remover Wipes ($5)
& eyeliner brushes & an eyeshadow brush!

* The only reason you'll need the makeup wipes is for mess ups - which I happen to make a lot of.

Okay..
1.) You'll need to cover your whole eyelid in the Plum Crazy eyeshadow. Go all over & up to the beginning of the eyebrow. Be sure to get up high in the inner corner of your eyelid too! -- Sorry, I don't know the correct eye terms :P
2.) Get your gel liner & draw an outline of a really high winged eyeliner look.
You'll be making it go a little higher than the outline - but that's what the liquid liner is for :)

3.) Fill in the outline with your gel liner.

4.) Starting at the outter corner of your eye (be sure to connect the top wing to the bottom line) - go along the bottom of your waterline with the gel liner.

^ My oh my, I'm so horrible at giving directions! I hope this makes sense :/

5.) Fill in your eyebrow with the gel liner.
Don't mind my overly hairy brows. I know I need to trim them, okay? lol
6.)Touch up the rough edges with your liquid liner. You'll also want to go in the corner of your eye with the liquid liner. Also, draw the eyebrow down a bit with the liquid liner. Extend the wing of your outer gel eyeliner just a little farther as well!
Make your drawn in eyebrow a bit thicker than your normal eyebrow.

Finished! 


You like? I hope so! Sorry I only took one-eye pictures. I got lazy and only ended up doing just one eyeball just to test it out lol. Lazy bones, I know!

Also, this look will look better with some mascara. I just didn't add any because I knew I'd be wiping it right off as soon as I did this post. The only kind of mascara I have is a high-end mascara & I don't want to waste it :P 

I'm not too sure why I put my blog name on all of the pictures? Like everyone is going to steal them or something haha. I'm sure people would love to take my hairy eyebrow pictures. I guess I did it out of habit from where I do it on my Tumblr. Oh wells! 
That's all for today! I hope you all (whomever may be reading) liked this post!